
Introduction
This article is a continuation of our series of articles on .Net Aspire. Do check out our previous post that explains .Net Aspire and why it is one of the most talked about .Net frameworks in the developer’s community. Today we will demonstrate .Net Aspire setup and deployment, and run a sample .Net Aspire application in Visual Studio. Let’s start with the prerequisites for the project.
Prerequisites for .Net Aspire
Here are the prerequisites for developing and running .Net Aspire projects.
Download Visual Studio 2022 Preview from here. https://visualstudio.microsoft.com/vs/preview/
You can also use Visual Studio Code, but it will not have the GUI-based project selection for .Net Aspire. For this example, we will use Visual Studio 2022 preview.
Create .Net Aspire project
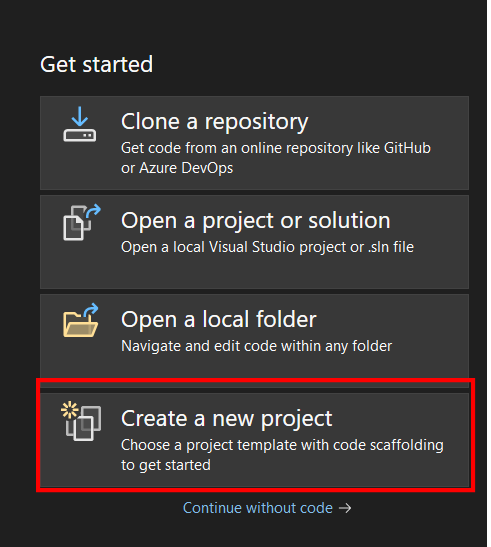
When you open Visual Studio, you will see the below screen, select the option of “Create new project”.
Select the .Net Aspire work starter application.

Next, provide a name for the project. Then you will select the .Net 8 version, currently, LTS is selected.

Then click “Create” to create the project. Visual Studio will take a moment to create all the artifacts of the project.
Project’s main components
Here is the project structure that you will see. We have highlighted the major components of this project.
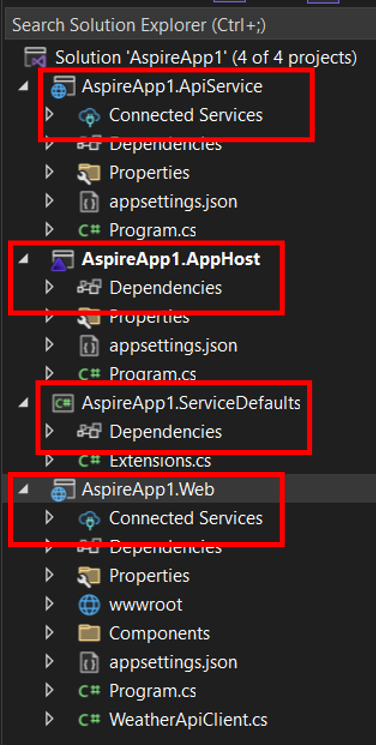
Let’s discuss the role of each of these components one by one.
AppHost (Orchestrator)
var builder = DistributedApplication.CreateBuilder(args);
var cache = builder.AddRedisContainer("cache");
var apiservice = builder.AddProject<Projects.MyFirstAspireApp_ApiService>("apiservice");
builder.AddProject<Projects.MyFirstAspireApp_Web>("webfrontend")
.WithReference(cache)
.WithReference(apiservice);
builder.Build().Run();
This snippet from the AppHost’s Program.cs initializes the application, sets up Redis for caching, and orchestrates the ApiService and Web projects. It ensures these components are interconnected and properly configured to communicate with each other.
ApiService (Data Provider)
var builder = DistributedApplication.CreateBuilder(args);
var cache = builder.AddRedisContainer("cache");
var apiservice = builder.AddProject<Projects.MyFirstAspireApp_ApiService>("apiservice");
builder.AddProject<Projects.MyFirstAspireApp_Web>("webfrontend")
.WithReference(cache)
.WithReference(apiservice);
builder.Build().Run();
The ApiService acts as the backend data provider, in this case, serving weather forecasts. It incorporates .NET Aspire’s service defaults to ensure consistent configurations across services and adds error-handling capabilities. It defines a GET endpoint /weatherforecast that dynamically generates a weather forecast, showcasing a practical implementation of a Minimal API in .NET Aspire.
ServiceDefaults (Shared Configurations)
//imports here
public static class Extensions
{
    public static IHostApplicationBuilder AddServiceDefaults(this IHostApplicationBuilder builder)
{
        // Configure OpenTelemetry for logging, metrics, and tracing
        builder.ConfigureOpenTelemetry();

        // Add default health checks
        builder.AddDefaultHealthChecks();

        // Configure HTTP client defaults for resilience and service discovery
        builder.Services.ConfigureHttpClientDefaults(http =>
{
            http.AddStandardResilienceHandler();
            http.UseServiceDiscovery();
});

        return builder;
}

    // Additional methods for configuring OpenTelemetry and health checks
}
ServiceDefaults centralizes shared configurations for logging, metrics, tracing, health checks, HTTP client resilience, and service discovery. Let’s explore it in a bit more detail.
Configuration: OpenTelemetry: Sets up OpenTelemetry for comprehensive observability, including logging, metrics, and tracing. This includes configuring ASP.NET Core instrumentation, HTTP client instrumentation, process, and runtime instrumentation, and conditionally adding OTLP exporters based on configuration.
Health Checks: Adds default health checks to ensure the application’s liveness and readiness, and allows for mapping of health check endpoints.
HTTP Client: Configures HTTP client defaults to enable resilience (like retries, circuit breakers) and service discovery, making it easier to communicate with other services in a microservices architecture.
Overall, it provides a baseline of service configurations that can be extended or customized according to the specific requirements of the .NET Aspire application.
Web (Frontend UI)
var builder = WebApplication.CreateBuilder(args);
builder.AddServiceDefaults();
builder.AddRedisOutputCache("cache");
builder.Services.AddRazorComponents()
.AddInteractiveServerComponents();
builder.Services.AddHttpClient<WeatherApiClient>(client => client.BaseAddress = new Uri("http://apiservice"));
var app = builder.Build();
if (!app.Environment.IsDevelopment())
{
    app.UseExceptionHandler("/Error", createScopeForErrors: true);
}
app.UseStaticFiles();
app.UseAntiforgery();
app.UseOutputCache();
app.MapRazorComponents<App>().AddInteractiveServerRenderMode();
app.MapDefaultEndpoints();
app.Run();
This snippet from the Web project’s Program.cs shows the setup process, including adding service defaults, setting up Redis for output caching, and configuring the HttpClient to connect to the ApiService. It defines the middleware and services that the Blazor app will use to render the UI and interact with the backend.
Sequence of control flow
Let’s analyze the control flow between the above-mentioned components of this project.
Originating from AppHost
• Function: it is the orchestrator for the entire application.
• Actions: Initialize the app, set up service connections – for caching Redis, and orchestrate the interaction between the different parts of the app. It uses DistributedApplication.CreateBuilder to create an application builder. It then creates a Redis container for caching and integrates the ApiService and Web.
Request goes to ApiService
• Function: it is the data provider for the frontend.
• Actions: Gets and fulfills the API requests for the frontend from the backend services. It builds based on the ASP.NET Core Minimal API standard. It uses shared configuration from the ServiceDefaults to manage the resilience and telemetry.
Request goes to ServiceDefaults
• Function: it is the shared configuration management between all the projects under the solution.
• Actions: it provides resilience, service explorer, and telemetry extensions and configurations. These configurations are reused in other projects too.
Request ends on the web project
• Function: deliver the user interface for the frontend.
• Actions: render the UI using Blazor, and interact with the ApiService. It uses Redis – from the AppHost – for the output catching and establishes an HTTP client connection with the ApiService, which enables seamless communication between the frontend and the backend.
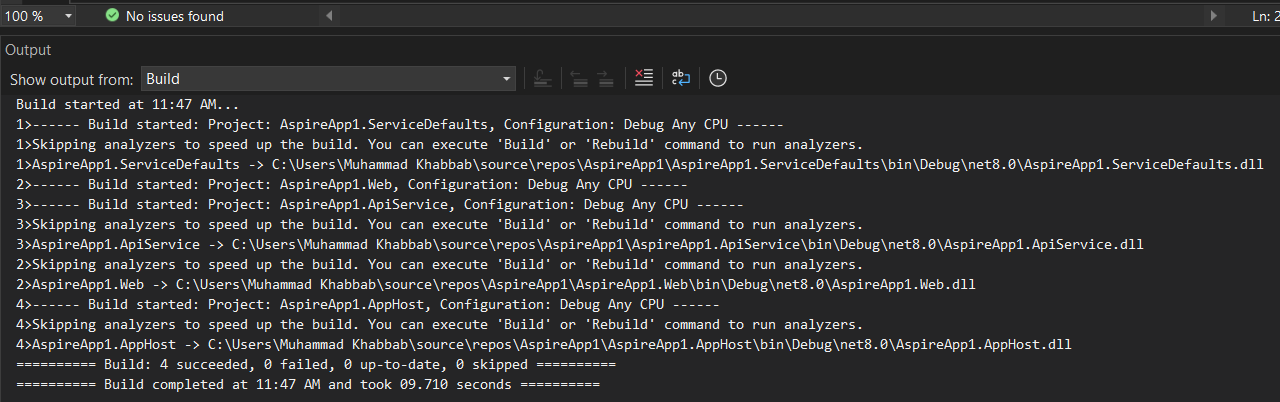
Running the project
Now that we have discussed all the core projects and their roles in detail, let’s run the project. Note that the project AppHost should be selected as a startup project. Docker desktop should also be running at this time.
You should see an output like below:
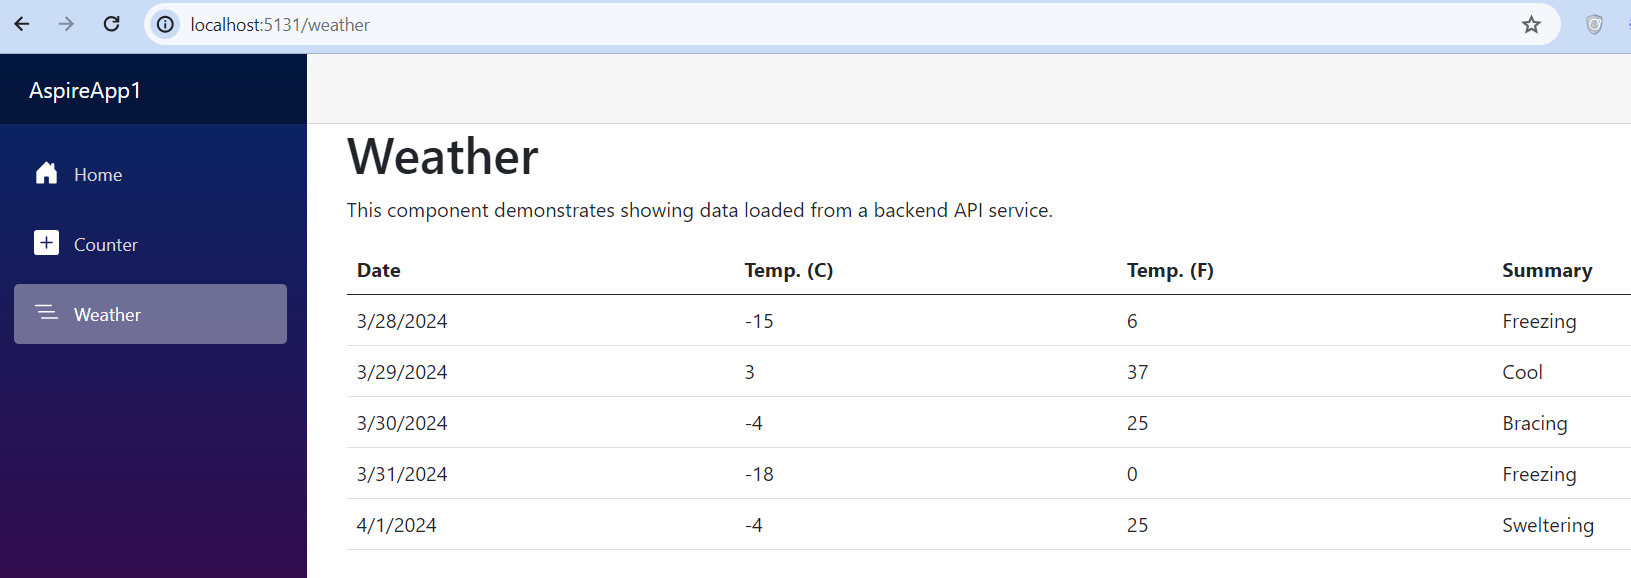
As the build is successful without any errors, the web project will automatically be opened in your default browser with this URL http://localhost:15194/

Congratulations, you have successfully performed .Net Aspire setup and deployment. If you click on the project “webfrontend” URL which is http://localhost:5131 you will see the below screen:.Net Aspire setup and deployment

Clicking the weather menu on the left, you will see the successful weather API call and its results:
If you have gone through this article, you have seen how easy it is to create and run a .Net Aspire project. Net Aspire has built-in components to develop a cloud-ready solution for building observable, production-ready, distributed applications.